If you can set up a bookshelf without swearing, you can mount a faucet. The distinction is water relocations, wood doesn't, and errors get wet fast. That's where people panic. I get it. I have actually pulled more than one soggy vanity cabinet due to the fact that a person thought plumbing professional's tape might treat a misaligned supply line. But with some clear thinking, a couple of low-cost devices, and a willingness to obtain a little cramped under the sink, faucet installation comes to be an uncomplicated, enjoyable job. You'll save money, find out exactly how your plumbing behaves, and win a component that does not shake, drip, or stain.
I've switched thousands of faucets in homes that ranged from new apartments to mid-century places with galvanized pipelines that resembled they would certainly dealt with a lengthy war. A lot of installs take under an hour when everything coordinates and two to three hours when it doesn't. If you budget plan an afternoon, you'll have time to cleanse the closet flooring, re-caulk the backsplash, and still make dinner.
Why people overestimate faucet installs
It's the crawl room. Not the one under the house, the one under your sink. The small, dark cupboard where somebody crammed a disposal, cleaning up products, and a tangle of pipes. That's the psychological obstacle. The technicians are straightforward: shut water, get rid of old component, tidy the deck, established new faucet, connect water, check for leakages. The intricacy comes from your particular sink and the ghosts of any individual who touched it before you.
If you can prepare for the usual grabs and collect the ideal materials, the task goes from nervous uncertainty to a tidy sequence. There's a factor a lot of plumbing technicians don't bring a helper for this job. A single person can do it easily if they prepare well.
Know your sink and tap design before you buy
Every faucet need to fit the openings in your sink or counter top. This matters greater than finish, brand name, or deal with shape. You'll normally encounter 3 hole patterns:
Single-hole: Modern faucets with a pull-down sprayer generally utilize this. If your sink has three openings, many single-hole taps include an escutcheon plate to cover the extras.
Centerset 4-inch: Two takes care of and a spout rest on a single base that drops right into 3 openings spaced 4 inches apart. Usual on older shower room sinks.
Widespread 8-inch: Three separate pieces, 2 manages and a spout, spread out throughout 3 openings that are 8 inches apart or adjustable within a range.
Kitchen sinks make complex things with devices like side sprayers, soap dispensers, or filtered tap. Inspect the bottom of your sink or kitchen counter to validate opening positions and spacing. If you possess a drop-in sink, you'll see the holes. If you have an undermount stone top, feel beneath or make use of a flashlight from over to see the amount of blanks you have.
As for valves and compatibility, most modern-day property faucets utilize flexible knotted supply lines with a 3/8-inch compression connection. If your shutoff valves are older 1/2-inch IPS or, even worse, flared, get adapters prior to you begin. Nothing eliminates momentum like a shock thread mismatch at 6 pm on a Sunday.
Tools that make the task painless
I have actually enjoyed people connect themselves in knots with large wrenches and sore wrists. A few basic devices and consumables get rid of the headache:
- Basin wrench, plumbing technician's putty or silicone (relying on your sink and manufacturer support), channel-lock pliers, adjustable wrench, utility knife. Teflon tape for threaded links, a tiny towel, flashlight or headlamp, and a bucket. Two new 3/8-inch braided supply lines if your tap doesn't include them or if the old ones look tired. Optional yet smart: a small ratcheting wrench with deep sockets for tap nuts, a putty blade, white vinegar for natural resource removal, and a roll of paper towels.
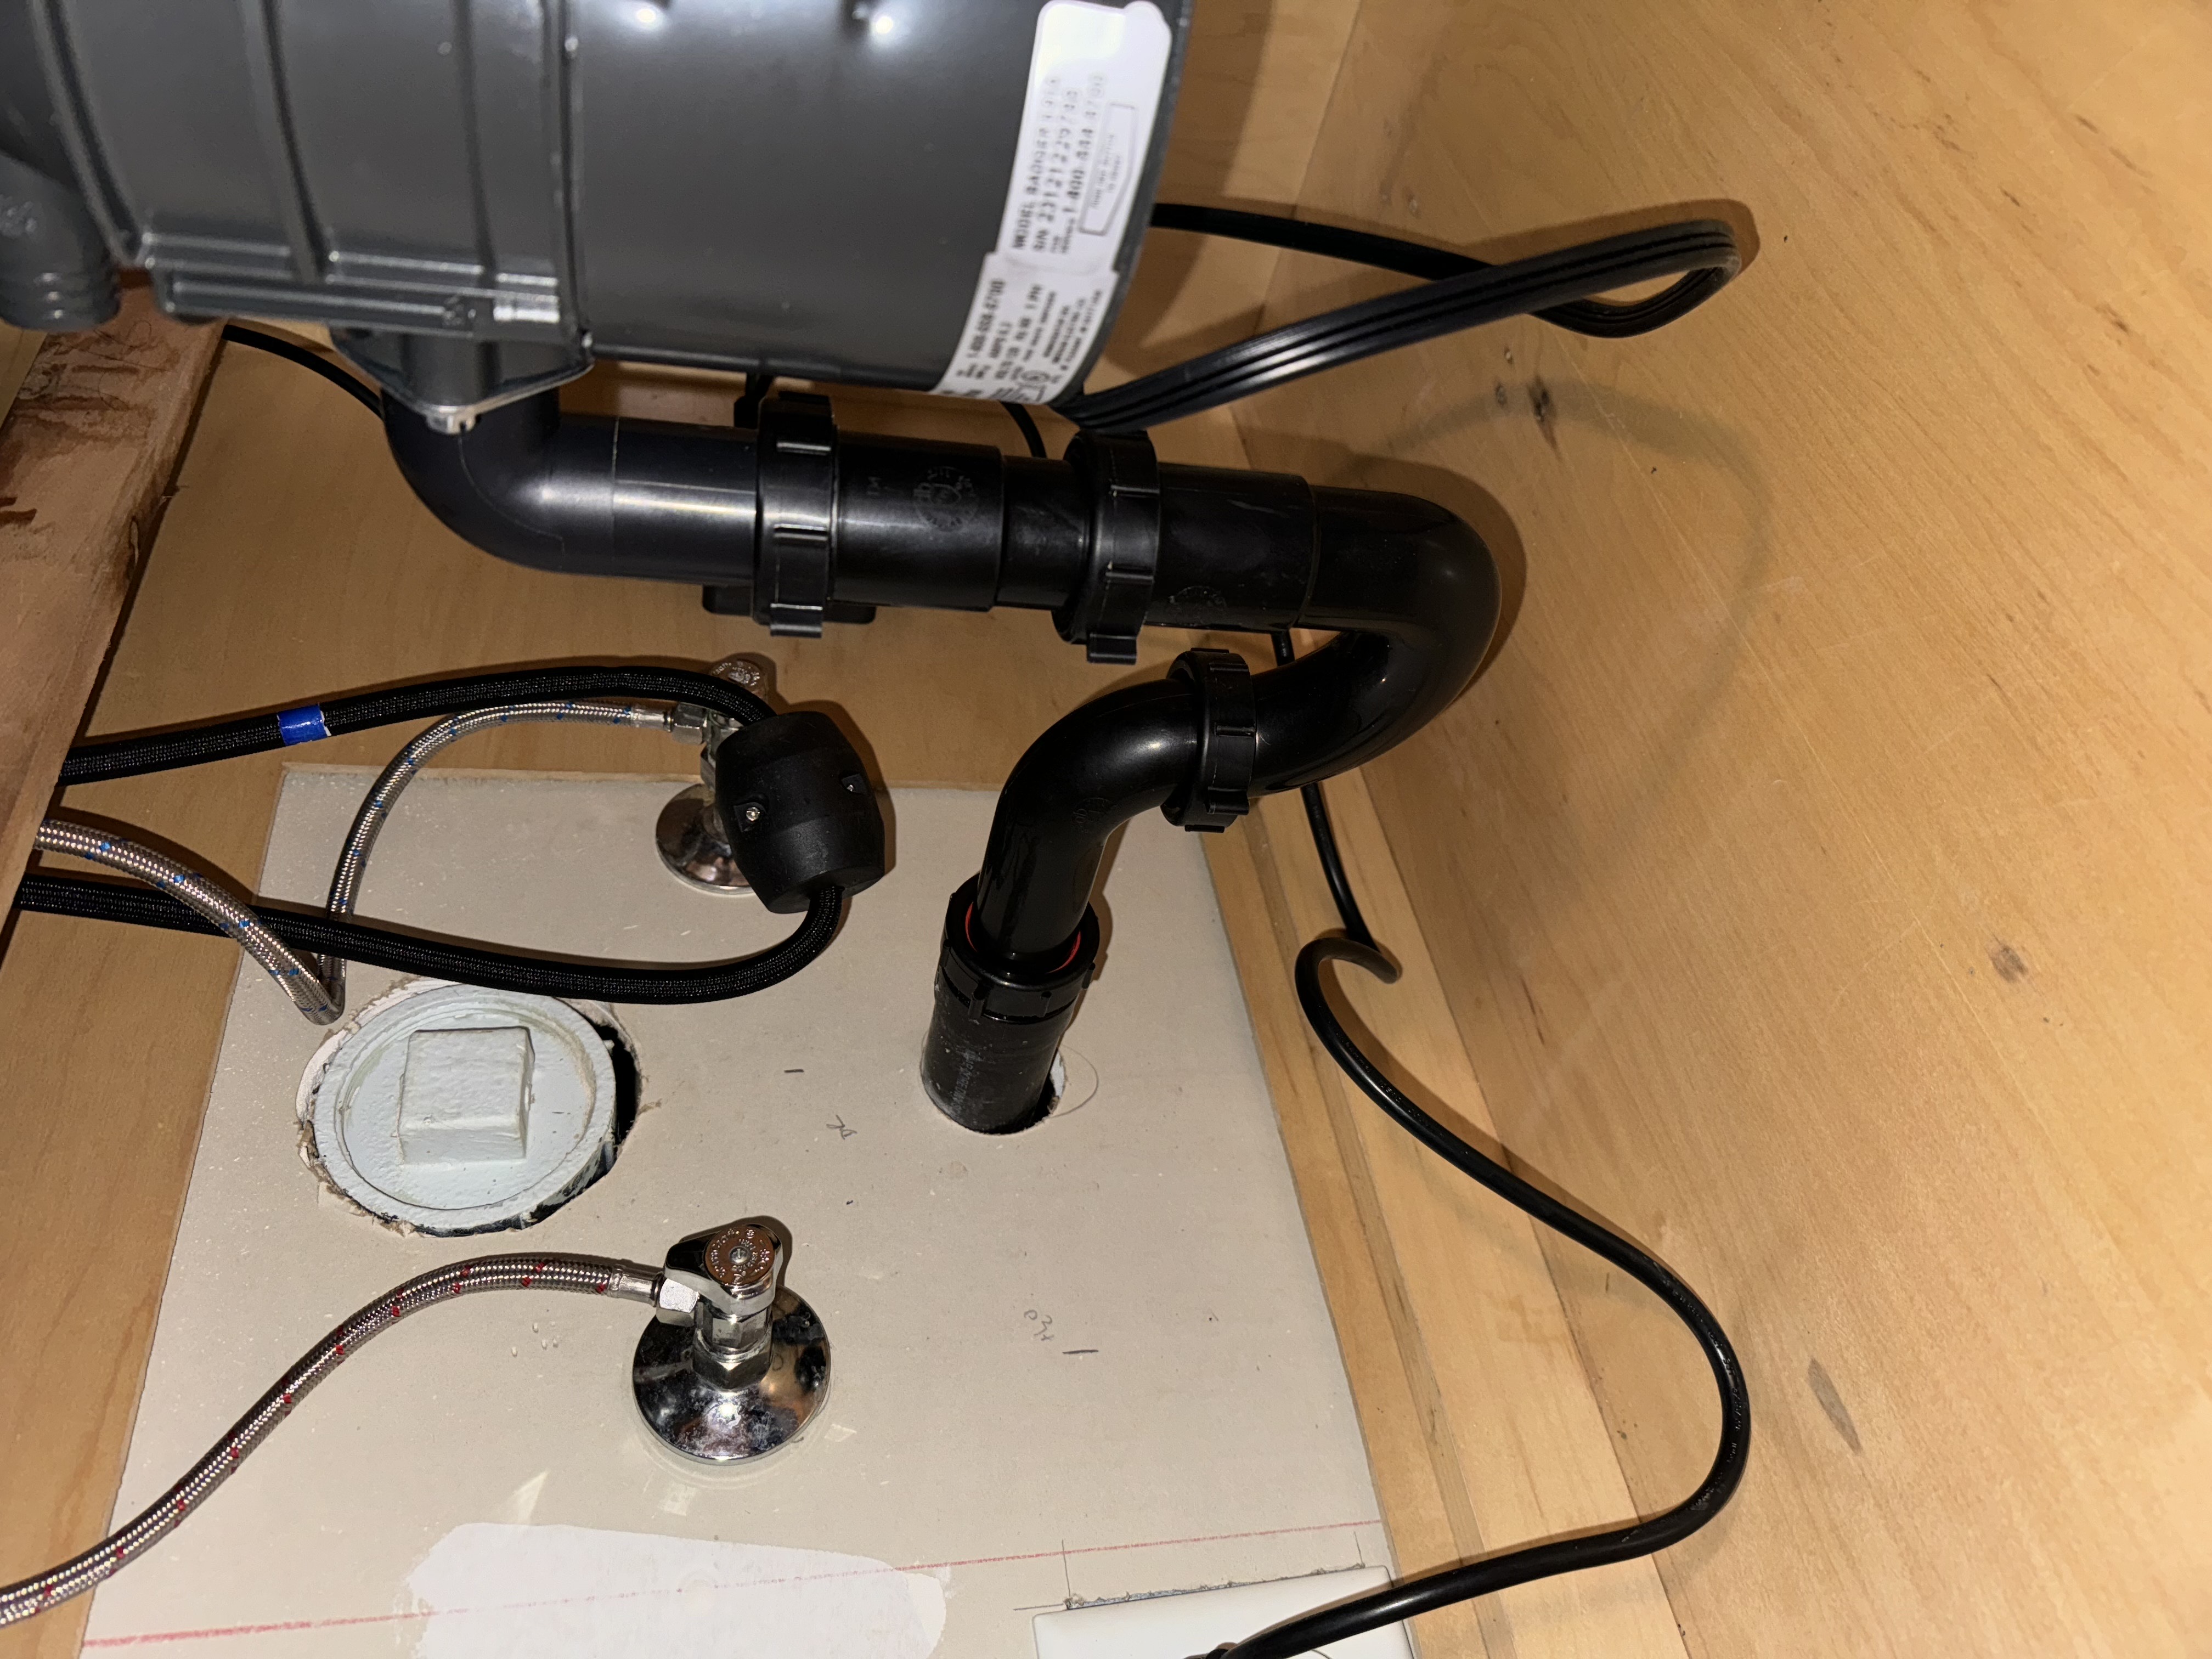
That basin wrench is the unsung hero. It gets to those placing nuts behind the sink container where your hands can not fit. Do not skip it.
The water shutoff: tiny valves with huge attitudes
Under the sink, you'll have two angle stops, one for hot, one for cold. Transform them clockwise to close. If they haven't relocated years, they might resist or weep. Do not compel a stuck shutoff with Hulk strength; back it carefully, shut it once again, and see if it acts. If a valve will not close totally, shut the primary water to your house. It's not remarkable, it's smart.
Once water is off, open the tap to eliminate stress. Keep the supply lines linked while you confirm the shutoffs absolutely closed. A sluggish drip might proceed for a few secs. That's penalty. A steady circulation suggests your valve is lying to you.
Removing the old tap without a meltdown
Clear the cabinet. Lay a towel. Place a container under the connections. Split the supply nuts at the shutoffs initially, not at the faucet. If a knotted line looks frayed or rusty, it has actually earned a one-way trip to the garbage. Separate the lines and allow residual water drainpipe right into the bucket.
Now seek out. You'll see one or two tap installing nuts on the underside of the sink deck. That's where the container wrench gains its maintain. Reach up, grasp the nut, and loosen up counterclockwise. Some old installs use horseshoe-shaped retainers with a screw; others make use of plastic wing nuts you can turn by hand. If someone used thread-locking substance in a fit of misdirected passion, apply a little permeating oil and give it a couple of minutes.
Once the nuts are off, the faucet will certainly prepare to lift. From above, delicately pry if it's stuck. Mineral deposits or old putty can adhesive it down. Use a putty blade, work gradually, and attempt not to damage the surface area. Draw the faucet, eliminate any deck plates, and after that assault the mess. A little white vinegar softens calcium. Avoid abrasive pads that can haze stainless steel or scrape porcelain. You desire a tidy, level surface for the new seal.
Plumber's putty or silicone, and where people go wrong
Manufacturers generally specify which to use. Check out the sheet, not because it's fascinating literature, however since it prevents leakages. Plumbing's putty stays soft and is ideal for metal sinks and several deck plates. Do not utilize it on natural rock like granite or marble unless it's identified non-staining. Silicone deals with everything, yet it can be messy, and the following individual will certainly curse your name while scratching it off. If you opt for silicone, a small, even bead is plenty. The seal happens from compression, not from a tube loaded with goo.
Dry fit two times, tighten up once
Before you squeeze anything, set the faucet on the deck to verify placement, reach, and hole coverage. Check that handles clear the backsplash which a pull-down sprayer can pull back freely under the sink without snagging on the disposal or cleansing caddies. If your tap includes a weight for the sprayer hose pipe, locate a clear decline zone so gravity can do its job. Mark the tube with tape where the weight need to live, normally a foot or two above the lower loop.
Now dedicate. Apply putty or silicone as routed, set the faucet, and from below, set up the installing equipment. Tighten up evenly. The objective is firm, not gorilla-tight. Over-torque can fracture porcelain and flaw metal plates, which ironically creates leaks. Verify the faucet does not rotate on the deck. If it does, tighten a touch more.
Supply lines: tiny gaskets, big consequences
If your tap includes integrated supply lines, life is simple. If not, string on brand-new braided lines to the tap tails by hand initially, then snug with a wrench. Really feel for smooth engagement. Cross-threading right here mistakes you'll pay for later.
At the shutoffs, cover male threads with 2 to 3 turns of Teflon tape just if you're securing conical pipeline threads. Compression fittings normally do not want tape. A lot of angle quits with 3/8-inch compression ports secure on the ferrule and must be joined clean and completely dry. Finger-tight plus a quarter transform with a wrench is usually enough. If you feel the ferrule bite, quit early, examination, and tighten only if you see a drip.
If you have an older home with flared fittings or inflexible copper materials, adaptors are your friend. A short length of braided stainless pipes minimizes anxiety and vibration, specifically with a pull-down sprayer.
The slow, mindful first pressurization
Close the tap manages. Crack the shutoffs open one at a time, slowly. Listen. You'll hear air cleanup. See every joint: the tap base, the supply connections at the faucet, and the shutoffs. A bead of water is a warning, not a disaster. Tighten up a hair a lot more up until the grain stops growing. Clean everything completely dry, then run the faucet on chilly, then warm, then both. Examine again. Operate the sprayer if you have one, then see the tube where it satisfies the faucet body. Many leakages conceal there.
Let the water compete a minute to purge manufacturing debris and loosened up mineral crumbs. If your tap has a detachable aerator, unscrew it and rinse. New fixtures occasionally spew small black rubber little bits from the hose pipes. That's normal for the first run.
What can fail and exactly how to recover
Stubborn shutoff valve that will not seal: Replace the shutoff, or closed down your home water, remove the manage and stem, and switch the washing machine. If you don't want to draw a valve today, shut the main, mount the faucet, after that reopen and observe. If the old shutoff weeps even when open, placed a little towel under it and prepare a solution soon. Do not overlook an active drip.
Leaking at the tap base: If you used silicone, it may take an hour to skin over. If water is wicking under the deck, your mounting gasket may be misaligned or the deck isn't level. Loosen slightly, reseat with also stress, and retighten. With putty, you can raise gently, roll a fresh rope, and reset.
Weak circulation: Frequently the particles screen in the aerator obstructed throughout the initial flush. Wash it. If that doesn't restore stress, examine the supply valves are completely open and that the hot and cold aren't reversed and half-closed.
Sprayer won't pull back: The weight is in the incorrect location or capturing on something. Remove bottles and baskets under the sink. Shift the weight so it can relocate openly. Some cupboards need a tiny stick-on glide or a hook to direct the hose pipe away from obstructions.
Weeping compression joint: Withdraw, realign the tubing, and retighten. Over-tightening can warp the ferrule and make securing worse. The pleasant spot is firm without panic.
The instance for changing supply lines every time
I do not reuse knotted lines unless they're all new and part of a matched system. Rubber ages. A $12 set of lines is more affordable than one water-damaged cabinet. If your tap gets here with lines kinky right into the body, take into consideration that a feature. Fewer joints, less points of failure.
Bathroom vs. cooking area: very same principles, various quirks
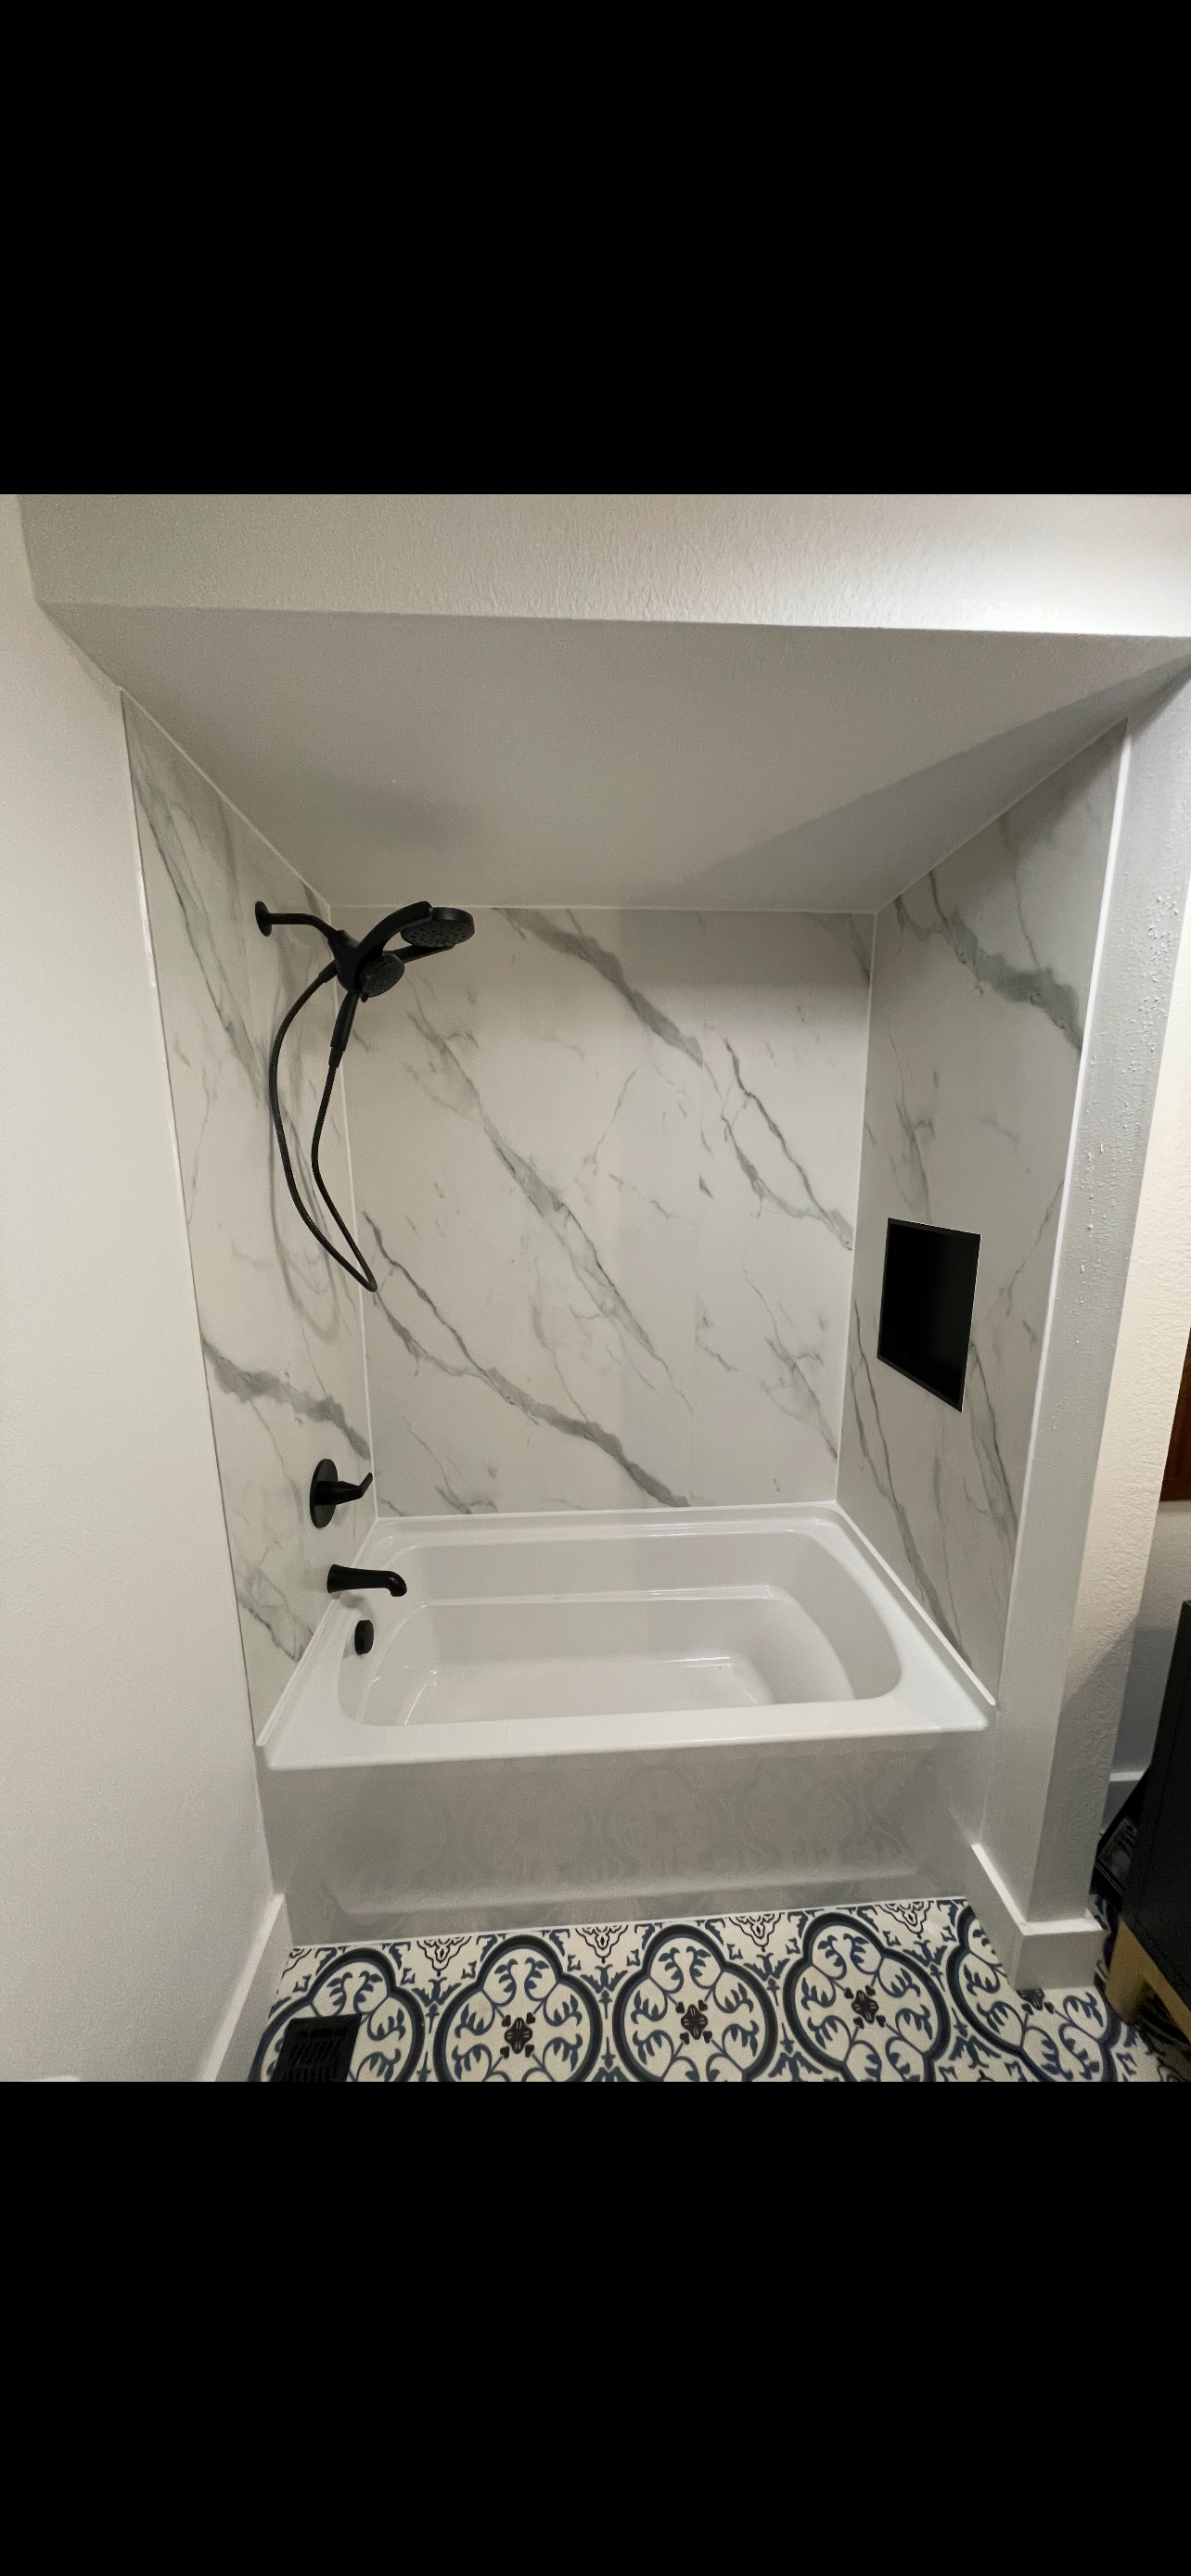
Bathroom taps live in limited quarters and sit near to a backsplash. That brief range matters. Some single-handle versions turn back for warm water and will smack ceramic tile if you don't gauge. Seek versions developed with forward-only manage activity for shower room basins near walls.
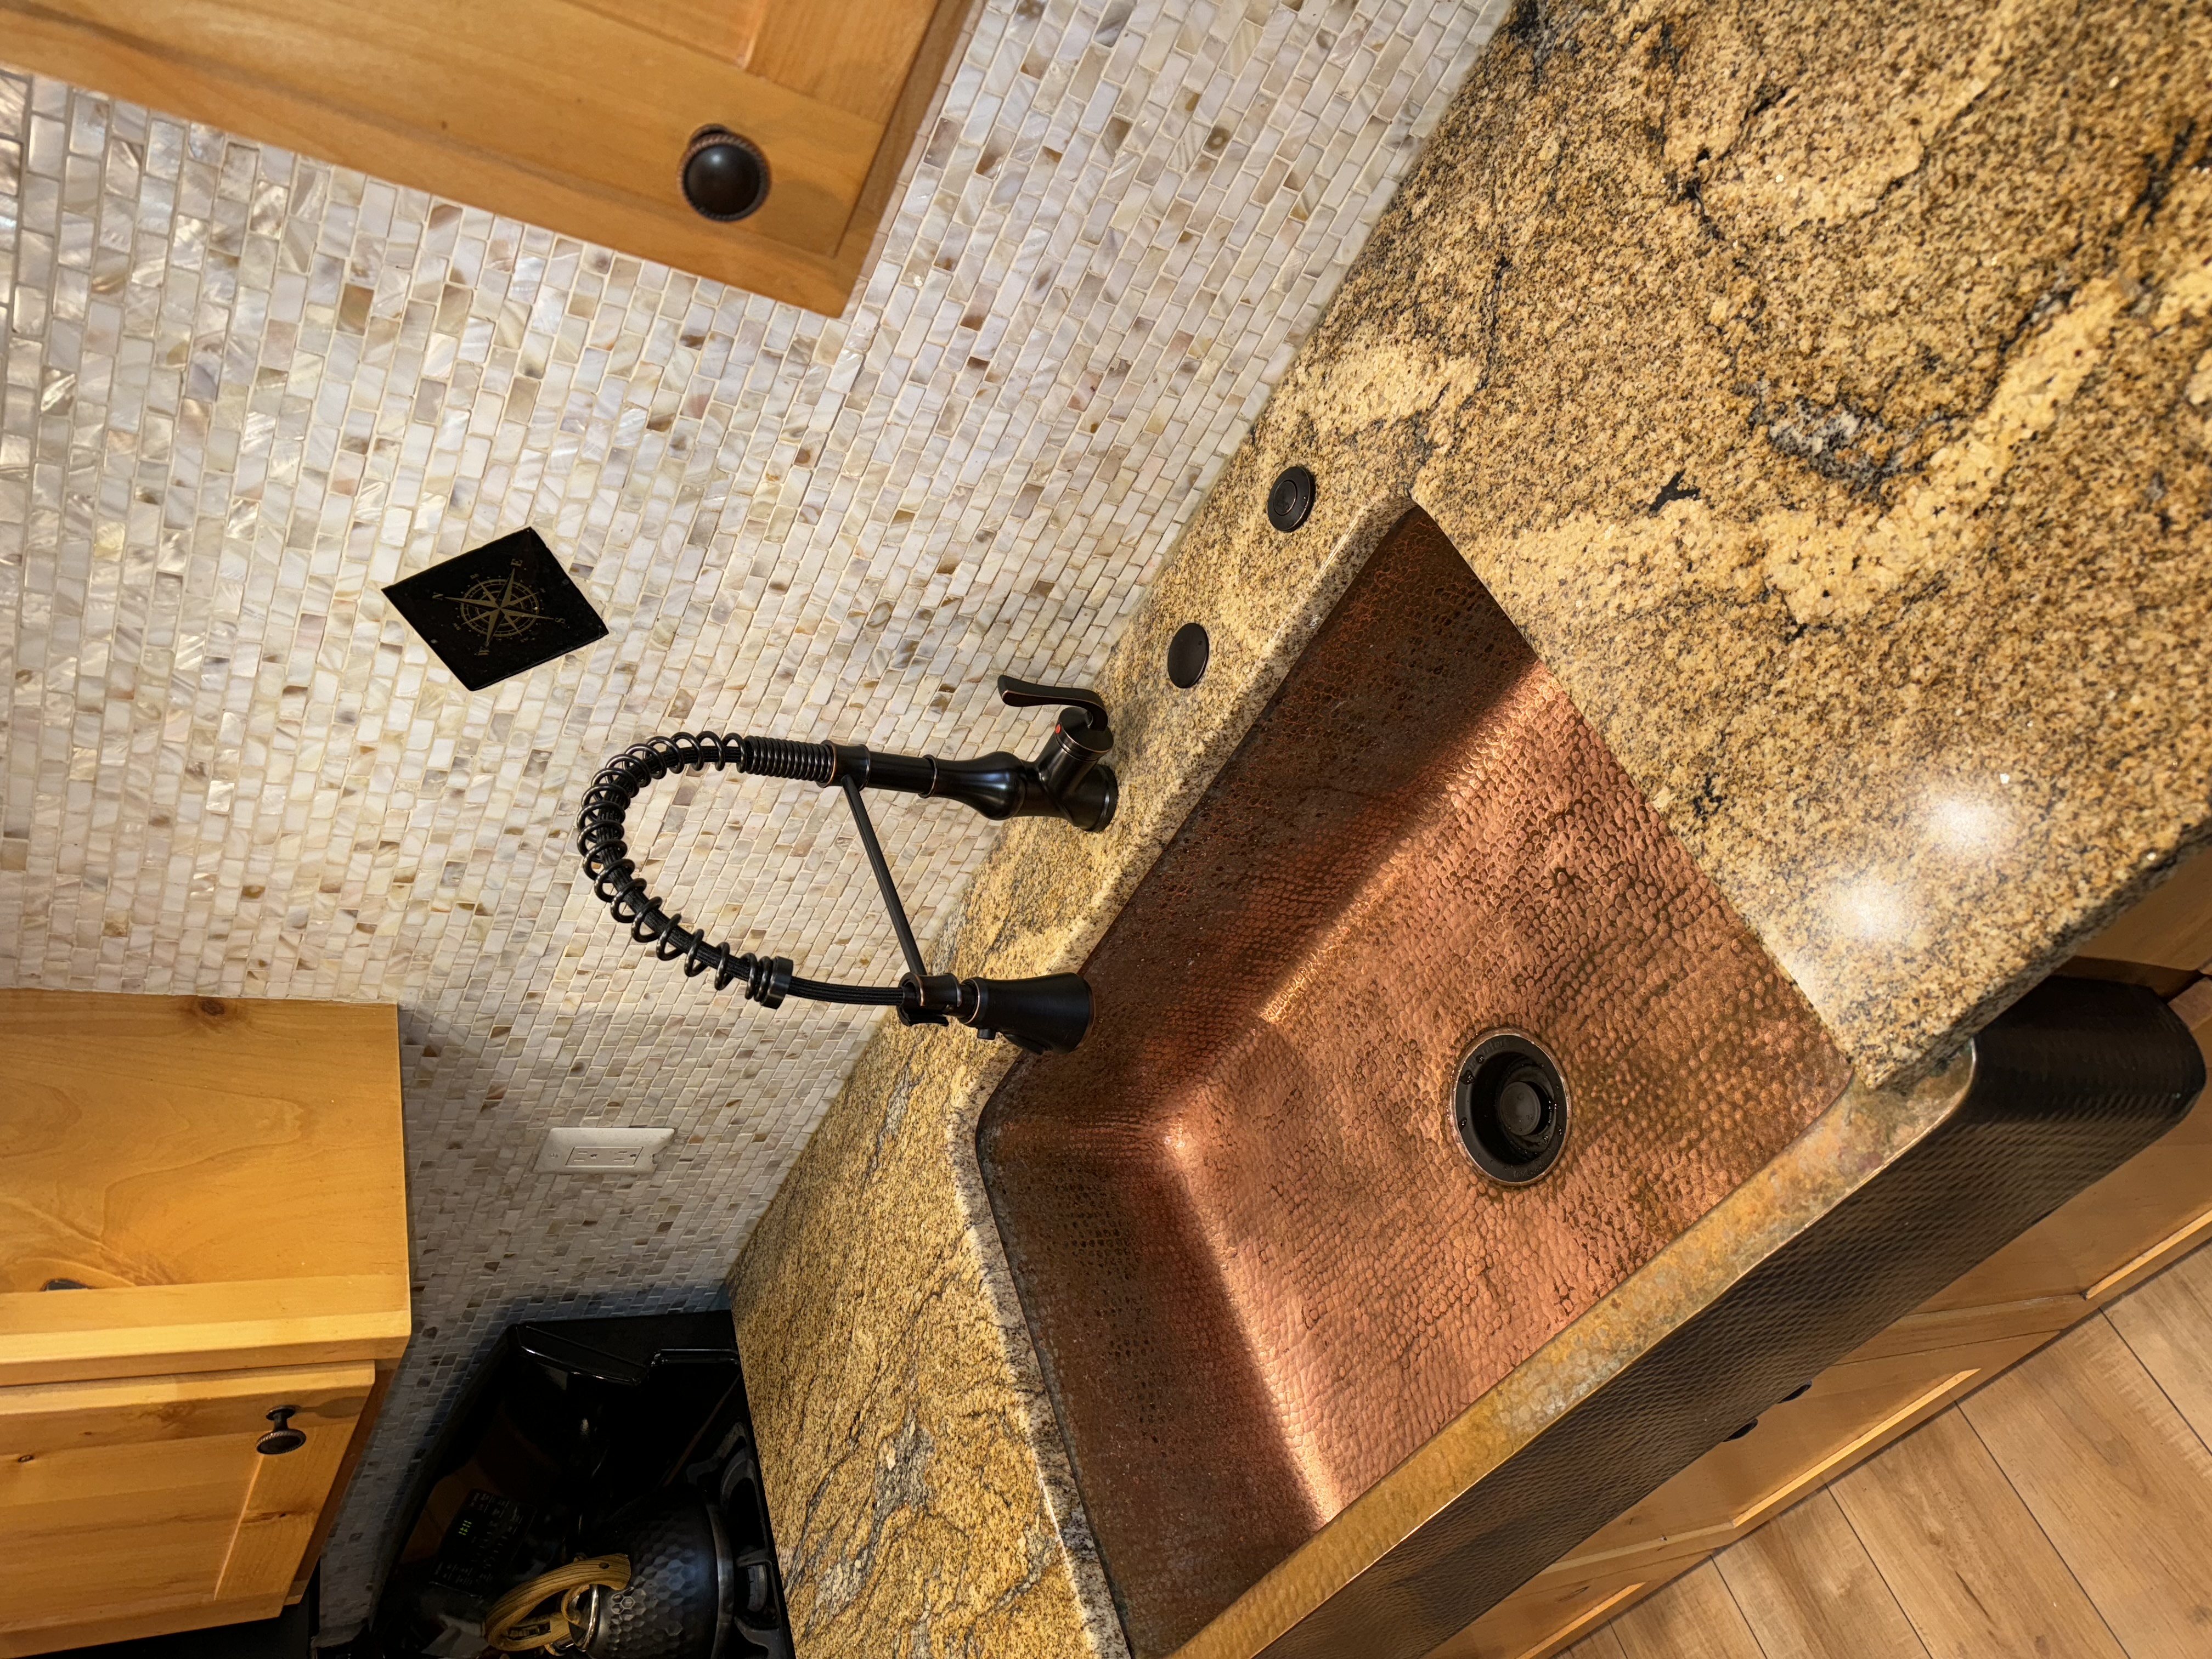
Kitchens handle more. Disposals, dishwashing machines, filters, and soap dispensers complete for area. The sprayer hose needs clear travel, and the faucet elevation need to make good sense under closets. Tall industrial-style taps look excellent in a catalog and can sprinkle like a fountain on a shallow sink. If you own a 6-inch deep sink, choose a faucet with a lower arc or a splash-controlling aerator. Your t shirt will certainly thank you.
Materials, surfaces, and what really holds up
I have actually seen budget plan faucets run clean for a years and costs ones gunk up in 2 years as a result of poor water. The interior shutoff matters greater than the luster. Ceramic disc cartridges are the criterion for longevity and smooth activity. For finishes, cleaned nickel and stainless hide finger prints. Chrome cleans easily and reveals its age truthfully. Matte black appearances sharp, yet it shows mineral areas unless you clean it. PVD coatings stand up to rust and deserve the upgrade if your home has tough water.
Weight doesn't constantly equivalent high quality. Some firms add heft that does not boost function. Concentrate on solid installing hardware, changeable cartridges, and adaptable supply lines that do not kink under hand pressure.
When to call a pro without apology
There's no medal for doing definitely everything yourself. If you see corroded shutoffs integrated to thin copper stubs, or if a previous proprietor soldered wild adapters so the area looks like brass spaghetti, think about a plumbing professional. If your sink deck is split, or you're changing from a three-hole to a single-hole on a rock kitchen counter, you'll want a maker to pierce cleanly. And if the main shutoff doesn't work and the city shutoff is buried or locked, stop and set up assistance. Peace of mind has a rate, and in some cases it's well worth paying.
Care that maintains a new tap new
Wipe it completely dry every so often. That's the trick. A soft towel after hefty usage protects against mineral crust from building. If your water is hard, a 50-50 mix of vinegar and water breaks down places. Don't make use of rough abrasives or powders that can scrape. Replace the aerator every couple of years or saturate it in vinegar Faucet Installation and brush lightly with an old tooth brush. Run the take care of delicately. Banging valves shortens cartridge life.
The practical time budget
If every shutoff turns, every nut rotates, and the tap fits, you can be performed in 45 minutes. Add an hour if you're eliminating persistent substances or dealing with confined accessibility. Worst situation with a stuck valve or a run to the shop for adapters, you'll spend three hours and discover more than you intended. That's not a negative afternoon.
A quick, tidy process that never ever fails
- Clear the cabinet, shut the water at the valves, and verify by opening up the old faucet. Place a pail and towel. Disconnect supply lines at the valves, eliminate installing hardware, pull the old faucet, and tidy the deck. Dry-fit the new faucet, confirm take care of clearance, use putty or silicone, after that mount and tighten up evenly. Attach supply lines, minding compression vs. pipeline strings, and course the sprayer hose pipe with a properly put weight. Pressurize slowly, examine every joint, run water to flush, evaluate once more after 10 mins, after that once more after an hour.
Follow that series and you avoid 90 percent of the headaches I see on solution calls.
Why doing it yourself deserves it
Faucet setup isn't just a price saver. It's an entrance task that demystifies pipes. You'll understand where your water originates from, just how shutoffs act, and what materials live under your sink. The following time you listen to a drip, you will not feel helpless. You'll know specifically where to look and what to touch. And if you ever do call a pro, you'll speak their language and improve work for a fair price.
The best part is the prompt reward. Turn the deal with, see a clean stream arc where there was a sputter before, and really feel the smooth travel of a ceramic shutoff that actually reacts. It's satisfying in a way that new drawer draws or a fresh layer of paint can't match, because it ties type to operate. The fixture you use a dozen times a day ends up being a tiny piece of engineering you embed in location yourself.
A solid faucet mount comes down to regard for basic steps, not magic. Shut water, make clean joints, prevent brute force, and examine your work. Do that, and switching your sink fixture will not just be much easier than you assume, it will really feel noticeable. That's the secret specialists learn after the very first couple of. You can learn it in an afternoon.
And if you ever questioned whether the phrase Faucet Installation belongs on a DIY list you can dominate, consider this your green light. Get a basin wrench, a towel, and a little perseverance. The remainder will follow.
Principled Plumbing LLC
Oregon City, Oregon
(503) 919-7243
https://www.principledplumbing.com/
Review us on Google